 A simple, fast boule recipe that requires very little work and comes out great? Look no further. This one can be prepared and fully baked in as little as 3½ hours. But . . . if it’s more convenient for your schedule, it can be prepared then left to proof at room temperature for many more hours. I’ve allowed it to proof for as much as nine hours at a room temperature around 68° F, then come back later to shape and bake it. This is such a flexible and convenient recipe for making great bread. You won’t have to watch the clock for this one. Often, people don’t make bread because timing dough making steps can be hard to schedule. This one has very few steps and the one’s it has can wait until you’re ready.
Autolyse Boule Dough
It starts with an autolyse – the process in which you mix the flour and water together and allow the mixture to sit for 15 or 20 minutes while the gluten activates. This step is so simple. It helps bread rise better because the gluten has a chance to start building a good structure. By the way, I’ve tested whether salt and yeast interfere with this process and I haven’t found that they do to any noticeable degree. Salt is said to actually enhance gluten formation. So when I autolyse, I add all the ingredients to the water, blend well and then stir in the flour.
A Little Kneading
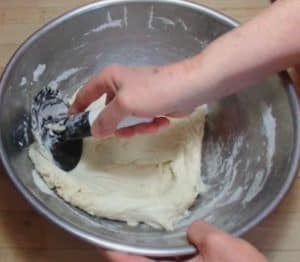
After that 15 to 20 minute period, only a little kneading is necessary to create dough strength. Kneading stretches and aligns the gluten into elastic sheets that can hold in air and help the bread dough maintain good structure. If you use the Dome, you’ll only have to knead for a minute or less. This is all the preparation you need to do. You autolyse, knead, and just leave the dough to proof for a couple of hours (or longer if that’s more convenient) until you’re ready to shape it into a loaf. Then you can shape it into a ball of dough and create tension on the top surface as described below. Or you can shape it in a banneton basket. The recipe follows and if you’d like, watch my Video on how to make this easy, delicious bread.
 Ingredients
12 oz of water (1½ cups)
.11 oz of yeast (1 tsp)
.30 oz of salt (1½ tsp)
.10 oz of molasses (½ tsp)
16 oz of all purpose flour (3 well packed cups)
Directions:
1. Add the water, yeast, salt and molasses to a mixing bowl. Stir it well.
2. Stir in the flour until consistently wet. Scrape in all the flour that clings to the bowl.
3. Autolyse by allowing the mixture to sit for 15 to 20 minutes.
4. Knead by spreading the dough to stretch and align the gluten. Using the dome will make this so much easier, plus it has its own bowl scraping edge. Turn the bowl so the spreading is done in all directions. Do this about a dozen times.
5. Cover the dough with plastic wrap or a beeswax cover to keep the dough from forming a skin.
6. After at least 1½ hours of proofing you can take the dough and shape it. You can leave it to proof for much longer too, if that’s more convenient. It depends upon your schedule! If you want this bread to proof fast, use warm water in the recipe. If you need to leave the dough for a long time, use cold water.
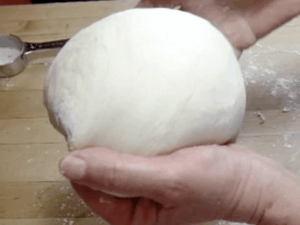
7. To shape the dough, scrape the dough onto a floured surface, dust your hands with flour and begin to shape it into a ball. You take a section of dough and fold it over toward the center and then working in a circle, take another section and fold it over toward the center, continuing until a ball is formed.
 8. To ensure good oven spring, create tension on the top surface of the dough ball. You hold the dough ball in your hands and gently pull the surface dough underneath to stretch and tighten the top. This tension makes the surface dough like an elastic band that can expand with oven heat but still hold a good boule shape.
9. Take a cookie sheet or other shallow baking pan and dust it with a ten inch circle of cornmeal, oatmeal or bran, or place some parchment paper on it. Place the dough ball top side up on the cornmeal, etc. to rise until doubled in volume. This will take about an hour and a half in a 68° – 70°F room.
10. When you sense the dough is close to double the volume, preheat the oven to 450° F.
11. Bake the loaf at 450° F for 25 minutes, then lower the temperature to 375° F and bake another 10 to 15 minutes.
12. Cool a couple of hours before cutting the loaf.
Using a banneton proofing basket to shape the dough
You might find it easier to shape the loaf in an 8½ inch banneton basket (also called a proofing basket or proving basket) if you happen to have one. It won’t have as much oven spring without the dough-tightening step but will usually look very polished. The one risk of using a proofing basket is the potential for deflating the dough when dispensing it from the banneton. This usually only happens when the dough sticks to the basket. So make sure it is seasoned and well coated with flour before adding the dough to be proofed.
Seasoning a banneton
1. If the banneton is new, first season it by soaking it in water for a few minutes and then placing about ¼ cup of flour in it. Turn the bowl sideways and move the flour around in a circle until the banneton is completely floured. Let it dry. Add a coating of flour to the banneton whenever you use it.
2. Coat the banneton. Form the dough into a ball by taking sections of dough and folding them to the center as described above. Then place the ball topside down in the banneton.
3. When the dough overtops the banneton – about an hour and a half or so depending on room temperature – preheat the oven to 450° F.
4. Sprinkle a circle of cornmeal, oatmeal, or bran, or use parchment paper on a baking pan to prevent sticking. Ease the dough onto the cornmeal by turning the basket upside down and gently shaking it up and down until gravity takes over and the loaf falls to the pan.
5. Bake the loaf at 450°F for 25 minutes, then lower the temperature to 375° F and bake another 10 to 15 minutes. Cool a couple of hours before cutting.
This recipe can be doubled. You can also substitute whole wheat flour for one or two cups of white flour. If you do substitute some whole wheat flour, add a little more water to the recipe, about 1 tbs. (1 oz) per cup of whole wheat flour. Enjoy!
Watch my video demonstration on How To Make A Simple Boule
Sign Up for this Blog
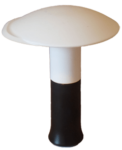
Learn more about the Dome Dough Maker

